Showing posts with label Make It Monday. Show all posts

Thursday, 10 April 2014

Make It Monday #159: No-Sew Quilted Card

It's been a while since I last participated on a Make It Monday Challenge.  This week's challenge found here really spoke to me so I decided to give it a go.  The challenge is to create a project by impressing a quilted patterned paper onto a card element with a cover plate or impression plate.

Here is my card.


I used various neutral-toned patterned papers from Papertrey to create my quilt which I later impressed with the quatrefoil cover plate.  I then finished it off with flowers and a sentiment from Mum's the Word.  I kept everything pretty neutral and used Berry Sorbet ink for the flowers to give it a pop.


Here is a close up of the quilt...


I really love this technique and will probably  make a card set using this technique.

Thanks for stopping by!

Wednesday, 5 June 2013

another flagged borders project

I totally enjoyed doing my flagged border card here that I decided to create another project for this week's Make It Monday challenge over at Papertrey Ink.


This time I created a layout incorporating my newest favourite banner dies.  This layout captures the highlights and sidelights for the month of April.  You can see some of my previous months in review here.  


I used my new favourite set from Papertrey called Sketched Shapes (don’t you love it… very modern and clean!). It also comes with matching dies.  The banners, arrows and triangles are all coordinating dies for this set.   Happy Spring is also from Papertrey’s Tag Its series. The rest of the patterned papers and embellies are from Simple Stories. 

Some close ups...


Also, did you notice  the “april” word in the title?  It is from Ali Edwards’ Months set.  From first look, it seems like someone has handwritten it.  But it is actually a stamp. Love it!

Thanks for stopping by!


Tuesday, 4 June 2013

flagged borders


It's been a while since I last participated on an online challenge.  This week's Make It Monday challenge over at Papertrey Ink is to make a project using flagged borders.   I just recently picked up some new banner dies so I thought this would be a fun challenge to join in.


Here is my card...


I used Papertrey's cardstock (winter wisteria, scarlet jewel and stamper's select white), Sketched Shapes dies and Birthday Style stamp set.  I also used Lil Inker Designs' stitched rectangle die.  

I wanted to try out a new colour combo for my card so I checked out Dynamic Duo's colour combo for this week's challenge.  And this is what they have...


I thought it was a fun combo, something I wouldn't think of putting together myself.   So that was what I used for my card.

Hope you are having a fabulous week.  Thanks for stopping by!


Monday, 18 March 2013

mim #108 - inked backgrounds

Heather showed us a cool technique to create inked backgrounds in today's Make It Monday over at Papertrey. I bought my ink blending tool awhile back thinking I might need it someday.  Today proved to be a great time to actually use it.

Here is what I came up with...  I first stamped my image using Versa Mark ink.  Then I topped it off with some embossing powder which I then melted using my heat gun. Then came the fun part.  I applied various hues of green ink using my Ranger blending tool.  Love the effect it gave on my background and how it allowed my image to pop. This may be a common technique for many but this was my first time trying this so I was thrilled!


I used Papertrey Delightful Doilies set (I forgot how fun it is to use this set), Countdown Details for the banner, Stamper's Select white cardstock, ink (simply chartreuse, aqua mist and hawaiian shores) and button.  I also used some twine from Jilly Bean Soup.

Here is a closer look at my embossed image.


Thanks for stopping by!  It's almost spring and we are still having snow tonight.  Stay warm!

Monday, 11 March 2013

mim#107 - clear card and copic colouring

This week’s Make It Monday over at Papertrey is all about the use of clear card and copic colouring.  I have a small collection of copic markers but I have not really spent as much time as I would have wanted  playing with them.  Glad I got a little push today.  The clear card is also fun to work with.  It’s like my card’s focal point is floating!

Here is my project...  I decided to make a set of itty bitty note cards.  I am thinking I can put this in my DD’s lunch box as a surprise for her. 


I used Papertrey’s Way to Go Kiddo (what an adorable set!), Stamper’s Select white cardstock and Smokey Shadow ink for the sentiment.  I also used Memento’s Tuxedo Black ink for the images, Fresh Ink’s provincial grey ink for the lines, various coloured cardstocks from my stash and copic markers.

Here's a look at each of them...


I also dressed up the inside a little bit...


Notecard #2 which is my favourite of the three...


And finally, notecard #3...


Hope you are having a great start to your week.  Thanks for stopping by!


Thursday, 7 March 2013

mim #106 - two toned stamped flower

This week's Make It Monday over at Papertrey is all about two-toned stamping.  It gives such a pretty effect especially on flowers.  I was inspired by Melissa to create more of a vintage-looking, shabby chic-ish card by using more muted colours.  Here is my card.


I used Papertrey's Rosie Posie, Turning a New Leaf and Text Style background sets, cardstock (kraft and soft stone) and inks (kraft, fine linen, melon berry, hibiscus burst).  The flourish is from MFT. 

Here is a side view of the card.  I did not adhere the flourish completely to give it some dimension.  I also did some masking before stamping my text background.  I also did not yet put a sentiment... thinking to wait until I need to use the card.


Thanks for stopping by!  By the way, we are giving away some pretty awesome coffee cozies care of Craftmate Virna.  Check it out here for a chance to win.  Open to all!


Wednesday, 20 February 2013

mim #104 - handmade pinwheel

This week's Make It Monday over at Papetrey is all about handmade pinwheels.  With the days getting longer, spring is here before we know it! 

Here is my card...


I used  Papertrey's Ribbon and Bows set and berry sorbet cardstock.  The patterned paper is from My Mind's Eye.

Hope you are having a fabulous week!


Thursday, 7 February 2013

mim#103 - die cut double up and dynamic duo #38

Betsy Veldman over at Papertrey has a brand new Make It Monday challenge where we are to create a project using a die cut inside a die cut.  Cool, right? One of the things I love love love about Papertrey is their dies.  They make creating polished and professional-looking cards a breeze.  So I dug through my stash and decided to use the Celebrations set, one of my sets that had not seen ink for a while.  I paired up the frame die from that set with the oval from the Limitless Layers set.  Match made in die cut heaven!

Here is my card.


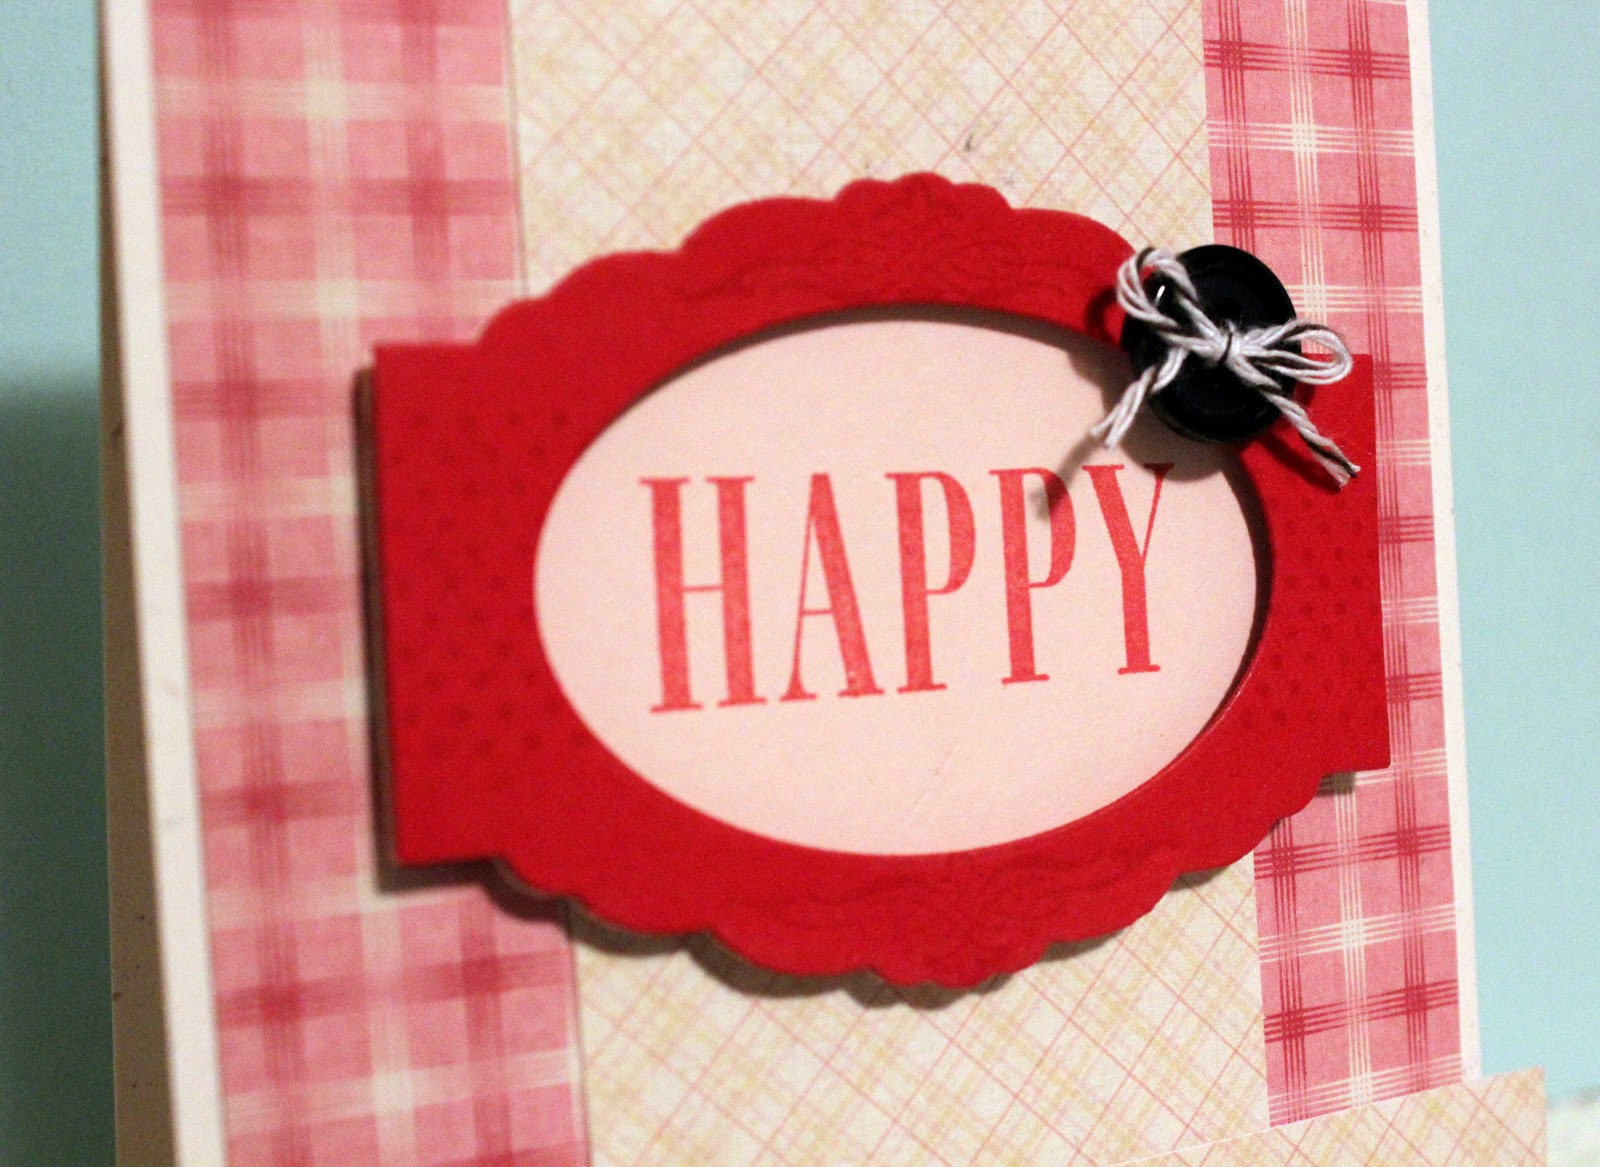
I used Papertrey stamp (celebration, polka dots), die (celebration, limitless layers:oval), cardstock (rustic cream, pure poppy and sweet blush ) and ink(pure poppy).  I also used my Cosmo Cricket patterned paper and some buttons and twine from my stash.

Here is a close up of the frame. I die cut my  frame in pure poppy and sweet blush cardstock.  Then I ran the red frame again through my Cuttlebug and die cut the oval to create an opening.


If you look closely, I did some tone-on-tone stamping with some polka dots on the side and the flourish on the top and bottom.  Makes it more interesting, in my opinion.  I then used pop tape to give it some dimension.

I also added a black button to create some balance against the strip of black paper under the sentiment.  Lately, I have been using  black on a lot of my projects.  For me, black helps ground things and bring everything together.  When I think my project is missing a little something something, my fallback is to always add black.  Problem solved!

I am also entering this card for this week’s Dynamic Duo challenge.  The colours this week are red and pink.  I hope you can see the sweet blush colour peeking from the back of my frame. 


By the way, Craftmates will be attending the Scrapbook & Cards Today’s Crop and Create event at Markham, Ontario this weekend.  


We will be there on both days and we are looking forward to tons of creating, chatting and dessert-eating.  Lots of top notch crafty teachers, fun challenges, fabulous loot bag and an amazing photo booth.  If you are attending, drop by to say hi!  The four of us will be there sporting our uber cool aprons. 

Thanks for stopping by!


Thursday, 31 January 2013

mim #102 - pillow box stamping


I am playing today with Papertrey's Make It Monday.  This week's challenge is to create a project using stamping on an assembled shape like a box or bag.


Here is what I came up with...


I used Papertrey stamp (super stripes, pretty peonies, polka dots, natural beauties), die (pillow box), ink (raspberry fizz, simply chartreuse) and cardstock (lemon tart).  I then added a ribbon from my stash.

Thanks for stopping by!


Thursday, 24 January 2013

mim #101 and CAS-ual Fridays # 86


 I am really enjoying participating in challenges lately.  This time, there is an interesting challenge over at Papertrey on Layered Embossing.  Confession time... I have not tried embossing before although I had good intentions.  I have my embossing powders and heat gun to prove it.  Somehow,  I just feel intimidated with that technique.  I finally gathered up the courage to try this and it was a lot of fun.


I also checked what is happening over at CAS-ual Fridays and found that this week's challenge is to create a CAS (clean and simple) card that has a long and short side.  Sounds fun!


I made this card for a friend who will be celebrating her birthday in Feb.  Here is my 4x8 card...


I used Papertrey Ink stamp (Sentiment Signs, Ribbons and Bows, Funky Florals), cardstock (berry sorbet), ink (smokey shadow) and patterned paper (striped smokey shadow).  I also used Versamark ink, SU white embossing powder and Ranger polysparkle powder. Love the shine and sparkle from the clear embossing powder.

Thanks for stopping by!


Thursday, 17 January 2013

MIM #100 and Moxie Fab World Challenge

Today, I made a card and packaging for two challenges.  Over at Moxie Fab World, they are having a challenge to make your own background paper.  This is the first time I tried making my own background paper because oftentimes, with my patterned paper collection, I can find a background paper that will work for my project.  But I did not realize how much fun it is to simply stamp on a blank canvass and just let your creativity take you to wherever you want.  I got the Natural Beauties stamp set as a freebie from Papertrey last year.  And this is the first time I have used it.  How did I manage to hold off this long before using this lovely, lovely set?

Here is my card.  One of my new colour combo favourites lately is yellow and gray.  I love its muted and subdued feel and I think I like how my card turned out.


I used Papertrey stamps (Natural Beauties, Simple Sentiments), die (heart border), cardstock (harvest gold, smokey shadow, stamper’s white) and ink (harvest gold, smokey shadow for the sentiment).  I also used Amuse’s Slate and Provincial Gray inks for the leaves and flowers.

Notice the overhang on my card?  I love the look of some elements of my card going “outside the box”.  So enter Papertrey’s Make It Monday Challenge #100.  

The challenge this week is to create packaging for cards with oversized embellishments.  Dawn has shown us several ways to accomplish this.  As for me, this is how I normally package cards that are bigger than the normal A2 size.


I used some coordinating patterned paper for my envelope.  This is a great way to use up those 12x12 papers I have been hoarding collecting.  I just basically made simple folds to create a pocket envelope like this.  And I finished it off with a half circle using my circle punch.


This is very useful for hand delivered cards (which I make a lot of).  So when my mood strikes, I build up my stock of these envies and even stamp a fun border for the recipient's name.  Here I used Fillable Frames #6 from Papertrey.


Thanks for stopping by!

Related Posts Plugin for WordPress, Blogger...